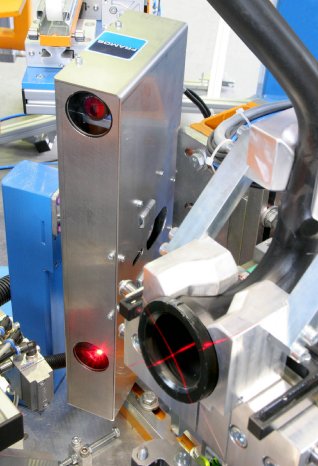
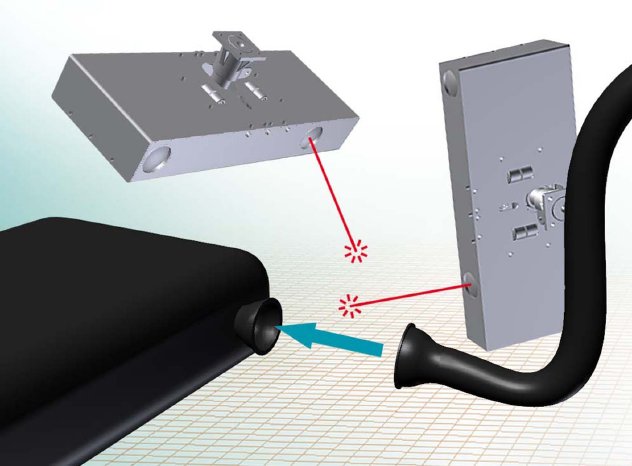
A recently created application using a combination of digital cameras and laser technology is now being used in the production of fuel tank systems for passenger cars: the latest generation of tank welding systems from BF-Maschinen GmbH (located in the Upper Bavarian town of Geretsried) is now being equipped with a system from FRAMOS that provides maximum precision in the fabrication of the tank to the filling pipe.
BF-Maschinen has delivered special machines to industrial enterprises around the world since 1994 and is even represented on board the International Space Station (ISS). The company enjoys an excellent reputation for its innovative products and manufacturing processes.
BF-Maschinen has the latest techniques for the welding of coextruded blow-moulded parts – with the corresponding sophisticated tasks on the production line. “The challenge posed by this tank welding procedure results primarily from the use of multi-layer plastics,” says Dr. Simon Che’Rose, Head of Engineering at FRAMOS. “Specific layers (ECOH layer/separating layer) must not be damaged when melting both elements during the welding process.” In order to ensure a reliable seal after making the connection, the accurate meeting of the parts is a prerequisite.
Through the calibrated combination of a high-grade industrial camera from SMARTEK Vision and a laser, which projects a cross of light onto the respective flange surface, FRAMOS has developed an active stereo system for the optical tilt check. Deviations in the parallel position of the surfaces to be welded are measured and communicated to the system control unit. “The optical system measures the position in the area of the relevant flange surfaces. If a part tilts, the deviation of the measured value from a specified set point is communicated to the system control unit,” explains Sebastian Stelting, Application Engineer at FRAMOS.
The tolerance is extremely tight. In theory, both parts and their respective deviations from the optimum could fall within permitted limits, yet the total deviation could still produce an unacceptable quality fault. “We’ve packed a large amount of intelligence into the system in order to achieve the best possible results and at the same time leaving control of the quality parameters entirely in the hands of the customer,” says Dr. Che’Rose.
Additional camera views further reinforce the quality assurance. For each welding procedure, their images document both the flange surfaces immediately after being heated as well as the welding bead after joining the parts. “In this way,” says Dr. Che’Rose, “we make the production situation visible and reconstructable for each tank.” By also making intelligent use of the test camera for this purpose, a total of only three cameras are required for each welding station.
At present, several systems are in use by customers and are fulfilling the expectations of reduced error rate and higher precision production. “We are working on the assumption,” says Dr. Che’Rose, “that many other applications will follow. The growing requirements for the supply industry, not only in the automotive segment, will further increase the need for optical systems for the purpose of quality assurance. With proven technology available to us, we can quickly and reliably develop and deliver solutions for this application area.”


